Wednesday 28 November 2012

Barry's hopefully helpful hints

                                                                                                                                                                                   I was lucky enough to be trained in house as an animator at Cosgrove Hall.  Nine of us (3 groups of 3) where taught on a 3 month intensive training course led by the great Barry Purves.  Barry was a great teacher and his tuition has always stood me on solid ground throughout my career.


At the end of the course he gave us each a list of "hopefully helpful hints", which I've decided to share.  I feel like I'm giving away a big secret, so if you ever reprint or pass them on make sure you credit them to Barry!


BARRY'S 
HOPEFULLY HELPFUL HINTS 


1- WHY? This is possibly the most important thing to ask before you start anything. Animation is not a matter of how things move, but more about why they move. What is being expressed. What story is being told. What is the motivation, and what is the emotion. Why is something moving. Answer that before moving on. 

2 - Firstly make sure that your puppet, object is up to the task. Will it fall to pieces with too much handling? Check everything about the puppet before starting. Is it well secured to the set. 

3 - Is everything secured to the set that needs to be. Nothing is going to wobble as you brush past it. Can you get in to reach the puppet. Is the camera in the way of your access? 

4 - Are you aware of the accurate frame shape. 

5 - Have you done your homework about the shot. Do you know exactly what needs to be expressed. Do you know where this shot comes in the story. Do you know what happened in the previous shot, and in the incoming shot. Do you know how many frames you have available, and have you paced the shot? Try and write everything down if you can. 

6 - More often than not, start with a tiny move - ease into every action. Nothing ever starts at full speed.

7 - Likewise, always finish with one more than you think necessary tiny move. This will soften things. Nothing ever comes to an immediate halt. 

8 - Anticipate a move or gesture - don't start with a jerk. A couple of frames or so in the other direction is always effective. Likewise when you stop a movement, a few frames in the other direction often help. 

9 - Do not start everything at the same time. Remember things will try to stay where they are, and will have to catch up after a few frames. The trick of leaving one thing in the same place as everything else moves always works. Think of a whiplash effect. 

10 - Likewise, things do not want to stop moving once they have started. Do not stop everything at the same time. 

11 - Always ask yourself, where is the movement, the energy starting from. What is the last bit to get this energy, and what is the last bit to lose this energy. Again keep thinking, why is anything moving. 

12 - Keep the eyes focused on something the whole time, unless being deliberately unfocussed. Lead with the eyes, or deliberately trail behind. The eyes are the main motivation for any movement. Keep the head especially focused when walking - don't let the head wobble about too much. 

13 - Don't get bogged down with the idea of a walk cycle. No-one actually walks in a cycle. Characters walk for a reason, to get somewhere, and with some expression. A cycle implies something mechanical. 

14 - Do not be afriad of large quick movements - if you feel a movement is perhaps too big, try moving slowly alongside it. this seems to make the big move look deliberate and balance things out. 

15 - Extremely large movements work well if use a few frames to soften them at the end. If doing a huge movement, keep something in the same place - this helps to keep the action planted and readable. 

16 - Keep movements soft and fluid - let things flow into each other, just allowing enough time for the strong pose to read. Keep movements clean and clear. As a suggestion, always do one telling gesture instead of two less clear gestures. 

17 - Clearly let a gesture be read by the camera. Don't do something important if it is hidden by the body. Always be aware of the camera and the composition within the frame. 

18 - Adjust the subtly of performance to whether the shot is a close-up or a wide shot, and so on. It's important to always remember how big a move is in terms of the travel in the actual frame. 

19 - Don't even try to use real life timing as a guide. We are not dealing with realistic actions. We need to emphasise certain things more and this effects our timings. Rotoscoping, I'm afraid, is not relelvent to animation.

20 - Don't do anything half hearted - let us see a gesture. Make sure you have enough frames for it to read clearly. If you only have a few frames it is probably not worth doing it. Don't dither with fussy cluttered gestures. 

21 - Always think ahead to where your character will be in 12 frames. Have you allowed enough frames to get there. Is the choreography of the body worked out to get into the next pose simply. Think ahead. 

22 - If it helps, use the bar sheets to draw some simple stick figures to work out the choreography. The puppet may dictate to some extent what it will do, but it is important to have a pose to aim for, and by a certain frame. Plan as much as you can. 

23 - Don't depend on the technology too much. Monitors are good for framing and composition, but feel the puppet moving in your hands. Internalise any movements before you start. Work out what is going where. Try to make the acting instinctive, and give it a shape and a flow. Think of the whole 'sentence' rather than the actual 'letters'. 

24 - I'd discourage any notion of shooting in double frames. You would not want to write with half the letters in the alphabet, or play the piano with half the keys taken away. 

25 - Always be aware of the previous and forthcoming shots, so you can match the speed and emotion. Don't ever think of a shot as a complete story. Lead into the next shot, make things flow. Don't let things come to a pause at the end of a shot. Try to think of the whole picture of a scene, not just the individual shot you are working on. 

26 - Listen to the rhythm of a voice or music, and find the phrasing. I'd be careful about over-emphasising lip-synch. It's the eyes we watch not the mouth. Give the impression of lip-synch rather than open-close on every syllable. 

27 - If you have several characters in a scene, work out who the main one is, and don't distract from him. stage it so that the focus is clear. Try not to have several characters being busy at the same time. It's OK to have moments of stillness. AS you start a shot, don't suddenly have a mass of movement that slows down towards the end of a shot. pace a shot - don't do all the interesting things at the start when you are fresh.


28 - If you are working with several characters, try and find an order in which to animate them and stick to it. 

29 - I find it always helps to click the camera myself - I then clearly know that that frame has been taken, and I can move forward. 

30 - Do not start a shot without knowing what the characters are going to do. 

31 - If you are not happy with how a shot is going, start again as soon as possible before getting yourself in a mess and wasting time and film. Remember the real world is full of ghastly schedules and budgets. 

32 - Try not to over-do the blinking. Blinking is basically a form of puncuation; the finishing of one gesture and being ready for the next one. 

33 - Likewise, I'd avoid the Disney ducking of the head and body before a movement. Anticpate but not so exaggerated. 

34 - Set yourself a speed when you are filming and keep to it. One second in half an hour is good. 

35 - Concentrate and try to complete a shot in one session. If you come back after lunch you can guarantee you, and thence the character, will be in a different mood and a different speed. 

36 - Enjoy it 

Saturday 24 November 2012

Doubles and singles

In the UK we shoot at a rate of 25 frames a second in the US its 30 fps.  

Most feature films will shoot on singles, 1 frame for every move, but it is also possible to shoot Doubles - 2 frames for every movement.
I've shoot on both In my opinion they both have their place

Singles will give you smoother, more realistic animation.  Doubles are sometimes thought of as a quicker easier alternative but they to do have advantages.  They'll will give more "weight" to your characters and can make the look of your animation more "cartoony". It also gives you somewhere to go, you can mix singles in for quicker movements.  

On "Raa Raa the noisy Lion" the portions of the puppets where quite stubby  so we decided to shoot a mixture of doubles and singles and go with a more cartoony style which also suited the design.

Sometimes we'd shoot part of a shot on doubles then break into singles for part of a move, sometimes one character would move in singles whilst another in the same shot would be moving on doubles. 


I would recommend shooting any vehicles or more solid objects in singles as they tend to strobe, but the main rule is - any camera movements should be done in singles (pans, zooms, focus pulls, etc)


Sunday 18 November 2012

The 12 Basic Principles of animation


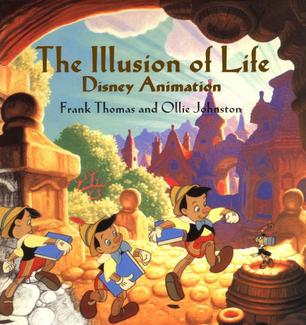
The Twelve Basic Principles of Animation is a set of principles of animation introduced by the Disney animators Ollie Johnston and Frank Thomas in their 1981 book "The Illusion of Life: Disney Animation.
They are
Squash and stretch
Anticipation
Staging
Straight ahead action and pose to pose
Follow through and overlapping action
Slow in slow out
Arcs
Secondary action
Timing
Exaggeration
Solid drawing
Appeal


Unfortunatley they don't all apply to stop-motion, as they where written by drawn animators.  Most will cross over, some need a little tweaking but 2 don't apply ("Straight ahead and pose to pose" and "Solid drawing"), so I've tried out a couple of my own.

1. TIMING
Expertise in timing comes best with experience and personal experimentation, using the trial and error method in refining technique. The basics are: more frames between poses slow and smooth the action. Fewer frames make the action faster and crisper. A variety of slow and fast timing within a scene adds texture and interest to the movement. Timing is critical for establishing a character's mood, emotion, and personality.  On a purely physical  level, correct timing makes objects appear to abide to the laws of physics.

2. ANTICIPATION
Anticipation is used to prepare the audience for an action, and to make the action appear more realistic. A dancer jumping off the floor has to bend his knees first; a golfer making a swing has to swing the club back first. The technique can also be used for less physical actions, such as a character looking off-screen to anticipate someone's arrival, or attention focusing on an object that a character is about to pick up.

3. STAGING
The purpose is to direct the audience's attention, and make it clear what is of greatest importance in a scene; what is happening, and what is about to happen.  This can be done by various means, such as the placement of a character in the frame, the use of light and shadow, and the angle and position of the camera.
Every pose or action should clearly communicate to the audience the attitude, mood, reaction or idea of the character.  Do not confuse the audience with too many actions at once. Use one action clearly stated to get the idea across, unless you are animating a scene that is to depict clutter and confusion.
The essence of this principle is keeping focus on what is relevant, and avoiding unnecessary detail

4. FOLLOW THROUGH AND OVERLAPPING ACTION
"Follow through" means that separate parts of a body will continue moving after the character has stopped. "Overlapping action" is the tendency for parts of the body to move at different rates (an arm will move on different timing of the head and so on). A third related technique is "drag", where a character starts to move and parts of him take a few frames to catch up. These parts can be inanimate objects like clothing or the antenna on a car, or parts of the body, such as arms.

5. SLOW-OUT AND SLOW-IN
As action starts, we have more frames  near the starting pose, one or two in the middle, and more frames  near the next pose. Fewer frames  make the action faster and more frames  make the action slower. Slow-ins and slow-outs soften the action, making it more life-like. For a gag action, we may omit some slow-out or slow-ins for shock appeal or the surprise element. This will give more snap to the scene.

6. SECONDARY ACTION
Adding secondary actions to the main action gives a scene more life, and can help to support the main action. A person walking can simultaneously swing his arms or keep them in his pockets, he can speak or whistle, or he can express emotions through facial expressions. The important thing about secondary actions is that they emphasize, rather than take attention away from the main action. If the latter is the case, those actions are better left out. In the case of facial expressions, during a dramatic movement these will often go unnoticed. In these cases it is better to include them at the beginning and the end of the movement, rather than during

7. EXAGGERATION
Exaggeration is an effect especially useful for animation, as perfect imitation of reality can look static and dull.  The level of exaggeration depends on whether one seeks realism or a particular style. Use good taste and common sense to keep from becoming too theatrical and excessively animated

8. ARCS
Arcs give animation a more natural action and better flow. Think of natural movements in the terms of a pendulum swinging. All arm movement, head turns and even eye movements are executed on an arcs.

9. SQUASH AND STRETCH
It can help give a sense of weight and flexibility to objects such as a bouncing ball, or can be useful in animating dialogue and doing facial expressions.  Taken to an extreme point, a figure stretched or squashed to an exaggerated degree can have a comical effect
You’re going to get more from this if you use replacements or plasticine, but with an armatured puppet you can help give the illusion of squash and stretch.  Keeping the character flexible, exaggerate the bend at the knees and waist on runs and jumps, or even putting small knee bends into talking shots when shooting from above the waist will give more bounce and life to your animation – just because the joints aren’t in shot doesn’t mean you can ignore them.

10. APPEAL
Appeal in a cartoon character corresponds to what would be called charisma in an actor. A character who is appealing is not necessarily sympathetic - villains or monsters can also be appealing - the important thing is that the viewer feels the character is real and interesting.


These next two are my own, I'm trying to keep them in the vain as the original, but basically I'm winging it.

11.  POSE AND PERFORMANCE (CHOREOGRAPHY)
Unlike drawn or computer animation the only way to do Stop Motion is through straight ahead animation, so planning ahead is essential.  Act out your scene or sketch important poses you need to hit on your barsheet.  Make sure you know your destination before you start, it’s easy to become distracted and go off and tangents.

12. CONSIDERED DESIGN
You’ll have to make everything you need from the characters, the sets, the props, to the sounds.  Make sure the characters and the props are designed and made to do all that they need to do.  The set’s should complement characters and not distract from them.  The sound will make up 50% of a film, don’t think it’s all about the visuals. 

Friday 16 November 2012

Camera's

Webcams
If your just starting out and don't want to spend much money then webcams are a good place to start, I would think most are compatible with all of the different types capture software.  Your best of getting one with manual focus otherwise it'll refocus on every frame.

Digital Cameras
Some compact cameras in the "Canon powershot" range will connect to Stop Mo Pro and Dragon Frame, they have them listed on there sites so you can check on there - use the DragonFame site it's easier and what works for one will work for the other.  I can't say for the other capture software though.

The best way to go is to use DSLR type camera's.  What your though is one that will give a "live view" again SMP and Dragon Frame list all compatible types.  Canon are the most popular, or there's Nikon's which tend to be more expensive, or Olympus.

The professional way is to use a high end Canon camera camera body such as the Canon EOS 1D mark 3 with a Nikon Nikkor Lens connected by a lens adaptor.


The Nikkor is an older type of lens which can't be controlled by the camera, - which is good because it cuts out any chance of the camera adjusting the settings on each frame. But it also has a manual type of aperture control with an aperture ring inside which closes every time the shutter goes.  This can be bad as even the tiniest microscopic change of size in the ring can slightly alter the light coming through the lens and cause a constant flickering in your film.
Fortunately as well as connecting the camera to the lens, the adaptor also stops this ring closing and opening on each shot and just holds it in the same  place.


The Cheapest of the all the DSLR cameras with live view is the Canon Rebel T range, starting with the Canon 450D, then 500D, the 550D etc.  The 450D is no longer being produced but you should be able to pick one up second hand for around £150.  At the moment the 600D is probably the best bargain new coming in at around £500 including a lens.

If you want to use the electronic Canon lens just make sure you turn off all the automatic settings - auto focus, auto white balance, etc.  The aperture and the film speed will be controlled through the capture software.

The cheapest Nikon seems to be the D5000 or the D5100 at about £400, then the D90 for a bit more.

Lens sizes
The 3 most useful lens sizes are 24mm, 50mm, and 85mm.  24mm is the widest therefore good for wide shots, 85mm is the narrowest and so good for close ups.  If you only want to buy one try and get a zoom that covers these sizes - so 18mm - 100mm would be fine.  Also a lens which has "macro" facility could come in handy - this allows you to put the camera right up against what your shooting and focus on an extreme close up.


Wednesday 14 November 2012

Capture software

To be able to capture your animations your going need a computer, a camera and some capture software.

I haven't used them all, but I'll tell you what I know.  Starting with the cheapest

BEGINNERS
onion skinning
This software is more aimed at beginners, they'll work with webcams, but I can't say beyond that.  They'll probably all use the "onion skinning" method of showing how far you've moved your object which places the live frame on top of stored from giving a blurred "ghosting" like image.


Helium Frog - free download -  http://www.heliumfrog.net63.net/heliumfrogindex.html
Never tried it so I can't really rate it, but it's free (this might make it unreliable).

Monkey Jam - free download - http://monkeyjam.org/
For PC's only, looks pretty good

I can animate 2 - £30http://www.kudlian.net/products/icananimatev2/Home.html
I've used this with web cams to teach kids of ages 8-15years and it's pretty good for that.  Your sound can be recorded straight onto the timeline, which my kids enjoy.  Basic, good fun for kids, a good place to start, but if you want to get serious you'll need better.
The makers "Kudlian Software" also make "Pro animate" at £80 which can be used with DSLR camera's.

I haven't used any of the next one's, but I guess there pretty much the same as the above

Frame thief  (mac's only)   -  $40 - http://www.framethief.com/index.html
IKITMovie  -    around $50  - http://www.ikitmovie.com/
Istopmotion (mac's only)  - from $50 -  http://www.boinx.com/istopmotion/mac/-


PROFESSIONALS and ENTHUSIASTS
If you want to get serious then you'll better kit.  All these will work with DSLR camera's and give you better results.  They should also all use the "step to live" way of showing you how far you've moved, which allows you to walk through your previous frames and land on the live view with the click of a button (although I can't vouch for Animator HD as I've never used it)
.
Animator HD  -   £90 - £180 - http://animatorhd.com/
Like I say, I never used this one so I can't comment on it.  I find the pricing on the website a little confusing and I'm not entirely sure what you get for your money in the different price ranges.

The two to choose from in my opinion are -

Stopmotion pro  -   from $70 - $295  - http://www.stopmotionpro.com/
I know "StopMo Pro" best and can talk about it with the most confidence. In my opinion you should go for the "action HD" version priced at £135.  It has all the features you need to create professional stuff and it brings it in cheaper than "Dragonframe", also you can upgrade later if you feel your missing out on something.
Where it excels  is in it's "edit" features - you can hide, delete, duplicate, and reverse frames easily.  It also has a nifty "rig removal" tool which allows you to paint out any rigs or blocks you might use to fly or jump your puppets around.


Dragonframe   -  $295 - http://www.dragonframe.com/
I've only used DragonFrame briefly, but I liked it very much.  It only has the one price, so no confusion over trying to decide which version is best for you.  It excels in it's looks and in it's DOP features (director of Photography), this means you can get the best out of lighting.  It is also compatible to "motion control rigs" which allow you to achieve automated camera moves (I'll write more on this in a later post).

Tuesday 13 November 2012

Different styles

Pixilation
A technique where live actors are used as a kind of living stop motion puppet.The great thing is you don't need to be able to draw or make puppets but you do need to use a bit more imagination to make it work well and go beyond the usual.


Puppet (traditional)
Probably the most common type of style associated with stop-motion.  The puppets have either wire or ball and socket armatures inside them to allow them to hold their pose.  


Claymation
Character's are made of a malleable substance, usually plasticine clay.  It can be difficult to keep your shape constant throughout the shot, but it does allow you to do some pretty extreme expressions
Will Vinton "The adventures of Mark Twain"


Replacement
Pioneered by George Pal, who would pretty much build different puppet in a different pose for each part of the movement and then replace them for each frame.  It's more common to just use replacements on heads or mouth shapes, not the whole puppet.


Found Object
Often used alongside "pixilation". Jan Svankmajer used this technique to good effect in "dimensions of dialogue" and more recently "Pes" uses it in his films.
Pes "The Deep"


Cut out
Characters are made from paper or card and animated flat on a table with the camera looking straight down from above. It's not used commercially any due to computer software such as "Cel action" being able to imitate it easily and more efficiently.

  Monty Python

Multiplane
A form of cut out where several layers glass are used to create different levels to animate on


Strata Cut
Bit of a mind bender this one - you basically build a long bread-like "loaf" of clay, pre- loaded with your varying imagery. You then then slice the loaf into thin sheets and take a frame for each cut. 
It's pretty much so specialized there's only one guy doing it - David Daniels. Check out his youtube channel for tutorials -  http://www.youtube.com/user/insanimatorDD

Sunday 11 November 2012

How we do it.


Animation is the illusion of movement.
 Animated films are made up of hundreds of pictures with slight differences of an action in each one.  When the images pass the eye fast enough they appear to be moving. 

How we do it.
  • Take a picture of something
  • change it
  • shoot it again
SIMPLE!  and that's why  love it.  At it's most basic you don't even need anything but a good imagination.


 But it takes practice to get good, and a little help can't go a miss.  That's where this blog is meant to come in. I intend to post tips and advice for anyone whose interested in making stop-motion flims.